Showing posts with label Appetizers. Show all posts

Friday, October 22, 2010

Cheese Straws

Share |

Help Delectalicious! grow. If you like this post and find it useful please pass it along using your favorite social media service. Each time you share this post you help others discover Delectalicious! I hope you enjoy your time here today. Thank you for supporting this site! ~Shannon


Cheese straws are a great little nibble to enjoy with your cocktail or mocktail!  I had never heard of a cheese straw until I moved to Georgia.  I saw them in the stores and gave them a try.  They were pretty good but I'm a Cheez-it freak and could not forsake my Cheez-it's for the cheese straws.  As fate would have it a friend of mine recently asked me if I had a great cheese straw recipe.  Which I did not.  Her question inspired me to find and add a cheese straw recipe to my repertoire.  Knowing in the back of my mind I would still be buying Cheez-its from the grocery.   I must say somehow I got lucky on the first try.  I found a recipe from Edna Lewis, the Julia Childs of southern cooking, and Scott Peacock that is outstanding.  I have now fallen in love with the cheese straw!  They make my heart go pitter patter!  The difference between a homemade cheese straw and a store bought cheese straw is UNBELIEVABLE!  I would choose a homemade cheese straw over a Chez-It every time!  However, if a homemade cheese straw was not available I would still eat a Cheez-it :-).


PRINTABLE RECIPE
Here's what you'll need:
1 2/3 cups unbleached all-purpose flour
1 1/4 teaspoon dry mustard
1 teaspoon salt
1/4 teaspoon cayenne pepper
1/2 pound extra sharp cheddar cheese, coarsely grated (2 1/2 cups)
1 stick (4 ounces) unsalted butter at room temperature
2 tablespoons water


Sift together the flour, mustard, salt and cayenne pepper.


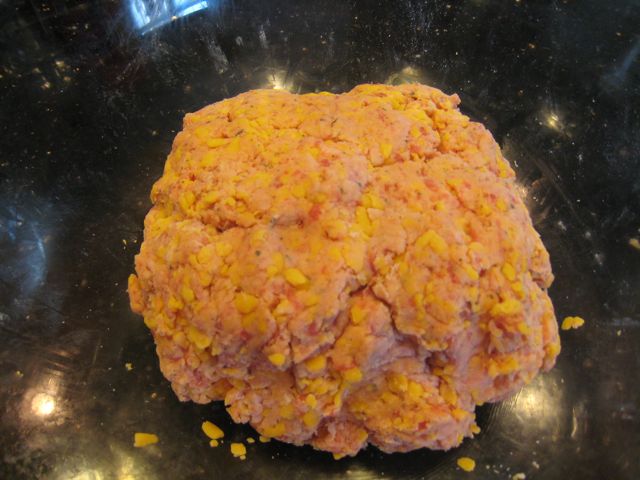
In another bowl beat the butter and cheese until well mixed


Gradually add in the flour.  Once all the flour is mixed in add the water and beat for 1 minute.  Turn the dough out onto a lightly floured surface and knead 4 or 5 times.  Roll out the dough on wax paper into a 12x9 rectangle.  Slide the dough onto a cookie sheet and refrigerate 15 minutes.  While the dough is chilling preheat the oven to 425.


Cut the dough in half crosswise then cut into 6 inch by 1/4 inch strips.  I have a crinkle cut veggie cutter that I used to get the crinkle edge.  A pizza cutter would work nicely as well.


Transfer the strips to a cookie sheet.  Bake one cookie sheet at a time for about 14 minutes or until the cheese straws are golden brown and crisp.  


Let cool slightly and then transfer to a cooling rack to cool completely.  Store in a tightly sealed container or baggie.  They actually improve in flavor when they are made a day in advance of serving.


Quote of the Day

Kindness is more important than wisdom, and the recognition of this is the beginning of wisdom.


       ~Theodore Isaac Rubin


This recipe has been linked up with the following linky parties.  Stop by and see what  delicious dishes others brought.  


Sunday Potluck @ Mommy's Kitchen


Enjoy, 
Shannon


Friday, October 15, 2010

Sausage Fillo Shells

Share |

Help Delectalicious! grow. If you like this post and find it useful please pass it along using your favorite social media service. Each time you share this post you help others discover Delectalicious! I hope you enjoy your time here today. Thank you for supporting this site! ~Shannon


Happy Friday everyone!  Here is a quick and easy snack to make while watching football this weekend!  Fillo dough is my enemy, but Fillo Shells I love love love.  When asked to make these delicious goodies in the past I would come up with every excuse possible to get out of it.  Umm sorry but my dog ate the recipe and I just can't remember how to make them. Or,  I need to wash my hair and you know that will take all day.  Or I don't cook anymore (wink, wink).  Seriously the filling is super super easy but you had to work with the fillo dough taking 1 sheet at a time, placing a small bit of filling, and then folding it up in a triangle shape.  Just thinking about it is torture!!!!   Well not anymore.  I decided to try out the fillo shells and they worked out fabulously.  Now, I'll make up a batch anytime no problemo.  Just ask.


PRINTABLE RECIPE


Here's what you'll need:
2 boxes of Fillo Shells
1/2 pound Italian or pork sausage
1/4 cup finely chopped onion
1/2 cup ricotta cheese
1/2 cup mozzarella cheese
1/2 teaspoon oregano
1 cup meatless spaghetti sauce for dipping


First brown up the sausage and onion and then drain off the grease.


Combine sausage with cheeses, and oregano.


Place filling in the Fillo Shells on a cookie sheet.  Bake at 350 for 10 minutes or until cheese is melted.  Keep an eye on them! Everything is already cooked.  By baking them we just want to melt the cheeses.


You can either put a little dab of spaghetti sauce on top of the filling before baking or serve the sauce on the side.  Next time I think I will serve it on the side.  I like it better without sauce, "G" likes it better with sauce.  On the side is the perfect compromise!


Quote of the Day
Always be a first-rate version of yourself, instead of a second-rate version of somebody else.
~Judy Garland


Enjoy,
Shannon


Friday, October 8, 2010

Pimento Cheese AKA Southern Pâté

Share |

Help Delectalicious! grow. If you like this post and find it useful please pass it along using your favorite social media service. Each time you share this post you help others discover Delectalicious! I hope you enjoy your time here today. Thank you for supporting this site! ~Shannon


Pimento Cheese is a southern classic.  This cheese has been showing up in our homes and grocery stores since the early 1900's.  It's simply delicious.  Cheap and easy to make and so much better homemade!  You will find this cheese everywhere from b-b-ques to weddings.  We serve it up on celery, stuffed in tomatoes, on crackers, as a sandwich (with crustless soft white bread of course), as finger sandwiches for swanky affairs, on hamburgers, and hot dogs.  I've never heard a cheese pronounced so many ways!  Around the south you'll hear it pronounced pi-men-toe, pi-men-ah, men-ah, menta, and some just say PC.  No matter the pronunciation it's always divine!  


Pimento Cheese AKA Southern Pâté
Here's what you'll need:
2 ounce jar of chopped pimentos
8 ounces shredded sharp cheddar cheese
4 ounces cream cheese
1/3 cup mayonnaise
1 medium thick slice of sweet onion
1 teaspoon worcestershire sauce
pinch of salt 
sprinkling of black pepper
dash of cayenne pepper 

**DISCLAIMER - my ADD kicked in and I forgot to put out the cream cheese and cayenne pepper, oops.  Please just pretend they are in the photo - thanks.**

In a food processor chop the onion.  


Add in the pimentos and give the food processor a whirl.


Add in the mayonnaise, cream cheese,  and worcestershire sauce and give it another whirl.

**DISCLAIMER... the cream cheese is not in the photo.  I'm busted!  When I tasted the pimento cheese to adjust the seasonings I realized I forgot the cream cheese and cayenne pepper.  So I just mixed them in at the end.  Pimento cheese is very forgiving like that!

Dump in the shredded cheddar cheese, pinch of salt, sprinkling of black pepper, and a dash of cayenne pepper.  Pulse the food processor until you get to the consistency you like.  I like mine really processed but many people prefer to keep larger shreds of cheese.  Taste.  Add more seasoning if need.


REFRIGERATE FOR AT LEAST 1 HOUR BEFORE SERVING.  It is very important to give the mixture time to come together and party.  Pimento cheese is best at room temperature.  So follow the recommendation and pull it out of the fridge for about 15 to 20 minutes before serving guests.  However, it doesn't bother me to eat it straight out of the fridge. I think it's yummy either way!


Quote of the day
All the great things are simple. 
~Sir Winson Churchill

Enjoy,
Shannon


Tuesday, October 5, 2010

Sausage Balls

Share |

Help Delectalicious! grow. If you like this post and find it useful please pass it along using your favorite social media service. Each time you share this post you help others discover Delectalicious! I hope you enjoy your time here today. Thank you for supporting this site! ~Shannon


Mmmmm, Mmmmm, good!  Every fall these sausage balls find their way back into our lives.  So quick and easy!  A perfect Saturday afternoon football snack.  They even reheat well for breakfast the next day.  You can't beat that!


Over the last few months I have been reading labels and trying to eliminate high fructose corn syrup and hydrogenated oils from our diet to become a little bit healthier.  Wow those two ingredients are in everything!  I bet you are scratching your head and thinking sausage balls and healthier lifestyle in the same post, really!?!  I know I know!  I could argue that while high in fat sausage and cheese are real foods :-).  Anyways,  every little change counts, right?  So I was really shocked to see that Bisquick has partially hydrogenated soybean oil and/or cottonseed oil.  REALLY????  Why?  All in the name of shelf life I suppose.   So in the future I will be reading up on how to make my own biscuit mix.  If you have a recipe for homemade biscuit mix PLEASE email me! I beg you :-)!


In the meantime here is the classic sausage ball recipe.


PRINTABLE RECIPE


Here's what you'll need:
1 pound of your favorite ground sausage.  We like it hot.
3 cups of Bisquick (in the future homemade biscuit mix)
2 cups of grated cheddar cheese


Optional add in - 1 can diced green chilies or diced jalapenos


Throw all the ingredients in a bowl and mix them together with your hands.


Roll pecan size balls and place on a lightly greased baking pan.


Bake in a preheated 400 degree oven for 15 minutes or until golden brown.


Cool slightly and dig in!


Cheers,
Shannon

Monday, September 27, 2010

My First Recipe Contest

Share |

Help Delectalicious! grow. If you like this post and find it useful please pass it along using your favorite social media service. Each time you share this post you help others discover Delectalicious! I hope you enjoy your time here today. Thank you for supporting this site! ~Shannon


Hot Popper Topper - Delectalicious!

I'm so excited!  Yesterday I entered my first ever recipe contest.  Yahoooo!!!  The contest is sponsored by the Real Women of Philadelphia.  Philadelphia Cream Cheese that is.  Check out the website Real Women of Philadelphia .   They are having weekly contests from appetizers to desserts.  My first entry was for my Hot Popper Topper appetizer for the Anything Goes Appetizer week.  It is a creamy spicy addictive spread.  Perfect on toasted french bread or Hamburgers!  Check out the recipe HERE.  So many amazing recipes have been submitted!  Cruise the recipe section to see them all.   Looks like winners for this weeks submission will be announced October 11-15.  Keep your fingers crossed :-)!


This weeks theme is Entree - Time Crunch.  Time to put the thinkin' cap on!  Put your thinkin' cap on and enter too!

Cheers, 
Shannon

Friday, September 24, 2010

Chile Con Queso

Share |

Help Delectalicious! grow. If you like this post and find it useful please pass it along using your favorite social media service. Each time you share this post you help others discover Delectalicious! I hope you enjoy your time here today. Thank you for supporting this site! ~Shannon


Today I'm cooking up Chile Con Queso my friends!  We love some good queso in this family! I have been on the hunt for a queso recipe that would taste like the queso at our favorite Mexican restaurant, Pappasito's, for years now.   Oh just saying the word "Pappasito's" makes my mouth water.  I miss Pappasito's!!! They have great queso, homemade flour tortillas, and THE BEST beef fajitas hands down of any mexican restaurant we've ever been to.  I've have tried everything!  Different kinds of cheeses, spices, creams, etc trying to arrive at this queso.  Out of the blue I found a fabulous mexican cookbook at Tuesday Morning.  The title is "MEX TEX Traditional Tex-Mex taste" by Matt Martinez.  You won't believe this, but the first recipe I flipped to was Chile Con Queso.  I noticed an unusual ingredient in the list.  One I have never seen used before.  I kept looking through the cookbook and so many recipes looked really good!  Now I started asking myself "should I buy it?" or "should I put it back on the self and walk away?" Have I mentioned I'm addicted to cookbooks???    Literally I stood there and had this debate with 
myself for quite awhile.  One customer walked by me a few times and looked a little concerned, LOL!    I finally reasoned with  myself using the logic that it is 70% off the original price.... that's a deal!  Thank my lucky stars my addiction won out that day.  Because this is just what I have been searching for!  


Can you guess what the SECRET ingredient is?????  


Printable Recipe
Here's what you'll need:


2 - 4oz cans green chilies, if you like it spicy add some jalepeno
1/2 cup finely diced fresh tomotoes
1/2 cup finely diced onion 
1/2 cup finely diced celery
2 teaspoons Tex-Mex Spice (see recipe below)
1 cup chicken broth (THIS IS THE SECRET INGREDIENT)
1 pound yellow american cheese cubed (purchased in the deli section of the grocery store)


Tex-Mex Spice
3 tablespoons plus 2 teaspoons ground cumin
3 tablespoons granulated garlic
2 tablespoons salt
1 tablespoon coarsely ground black pepper


Mix together in a small airtight container. Use this as seasoning in all your mexican recipes.


Cooking the Queso
In a saucepan combine everything but the cheese.  Simmer for 5 minutes


Turn the heat to medium low and add the cheese.  Stir occasionally until melted.


Pour it into a bowl and dig in with your favorite tortilla chips!  


We used to be "Rotel" (velveeta and rotel tomatoes) people.  Not anymore.  This takes just a few more minutes to prepare than Rotel but is soooooooo worth it I promise!


Cheers,
Shannon

Wednesday, September 22, 2010

Warm Corn Dip

Share |

Help Delectalicious! grow. If you like this post and find it useful please pass it along using your favorite social media service. Each time you share this post you help others discover Delectalicious! I hope you enjoy your time here today. Thank you for supporting this site! ~Shannon


Football and corn dip go hand in hand around here.  When I was living in Georgia EVERYONE had a variation of this dip.  The corn dip always made a fine appearance at every get together, football or otherwise.  It is spicy, cheesy, gooey, deliciousness.  I warn you it is truly addictive.  It's even better the next day!  And many will tell you they just can't stop eating it.  

Warm Corn Dip
adapted from Emeril Lagasse

Ingredients
2 Tbsp butter
1/4 c finely diced onion
4 oz can green chilies
1 1/2 Tbsp fresh minced garlic
3 cups corn (fresh, frozen, or canned)
1 small jar roasted red peppers, diced
1/4 c green onions (green part only)
4 oz grated monterey jack cheese
4 oz grated cheddar cheese
3/4 c sour cream
3/4 c mayonnaise
Emeril's Essence, cayenne pepper, and salt to taste

Preheat your oven to 375.  

Melt butter in a skillet over medium high heat.  Once butter is melted add the onions for about 3 to 4 minutes.  Now add the green chilies and garlic and continue to cook for about 2 more minutes.  Pour in the corn and cook for 5 to 6 more minutes.

Place the cooked mixture into a mixing bowl.  Add the remaining ingredients and blend well.  Season with Emeril's Essence, cayenne pepper and salt.  Now don't be shy here!  This is what really brings the dip together!  I will sprinkle both Emeril's Essence and the cayenne pepper in a thin layer over the top, stir, and then taste.  When there is a slight burn after swallowing I know I've gotten to the right place.  If you don't like it quite that spicy back off of the cayenne a little.  Trust me, I do this every time.  And while some will say "oh that's spicy" they continue to eat and eat and eat and eat.

Now place the dip in a casserole dish and bake in the oven for around 20 minutes or until the dip begins to bubble.  

Serve with Fritos or tortilla chips.  Fritos are always my 1st choice.

This is a contributing post at Mommy's Kitchen for Potluck Sunday.  Stop by and see what everyone's bringing.

Cheers, 
Shannon

Thursday, August 26, 2010

Creamy Hummus

Share |

Help Delectalicious! grow. If you like this post and find it useful please pass it along using your favorite social media service. Each time you share this post you help others discover Delectalicious! I hope you enjoy your time here today. Thank you for supporting this site! ~Shannon

Hummus is one of my favorite snacks.  I enjoy it with veggies, pita bread/chips, and sometimes even spread on a sandwich.  My favorite store bought brand is Sabra.  So creamy and dreamy!  After buying it for years I finally decided that I would give it a try at home.  Here's what I came up with.

First of all who knew that Garbanzo beans and Chickpeas were the same thing? Obviously not me.  I went to the grocery in search of chickpeas and they didn't have any.  What?!?  No Chickpeas how could they not have chickpeas.  Determined to figure this out I came home and did a little research about chickpeas and learned chickpeas and garbanzo beans are one in the same.  So back to the store to buy the garbanzo beans :-).   I love learning new things!  Don't you?


What you'll need

1/4 cup tahini
1 lemon juiced
1 19 oz can garbanzo beans or chickpeas drained, reserve liquid
1/4 cup or so of reserved chickpea liquid
1 to 2 TBSP canola or olive oil
salt to taste
1/4 teaspoon cumin
1 or 2 cloves garlic 


The secret to a really creamy hummus is blending the tahini and lemon juice together first.  Throw em in a blender or food processor and give it a whirl.  A food processor works best but just use what you have.


By the way.  This is the BEST lemon juicer I've ever had.  I highly recommend it.  I have one for lemons, lime, and oranges.  It gets ALL the juice out!  See how it turns the lemon almost inside out.  Oh my, this photo is making me crave homemade lemonade!  Focus, Focus! Back to the hummus.


Ok, so next add in half of the reserved liquid, 1 TBSP canola oil, dash of salt, cumin, and about half of the chickpeas.  Blend until smooth.  Add in the rest of the chickpeas and a little more reserved liquid to reach the consistency you like.  Blend.  Taste.  The beauty of hummus is that you make it to taste.  Just keep tasting until it's how you like it. I like to refrigerate for at least 1 hour to let all the flavors blend together, but you can serve right away.


Now pour it in a bowl.  Make a little indentation on the top and add a splash of canola oil.  Optional toppers would be minced garlic, parsley, cilantro, paprika, or pine nuts toasted in the oil.


Yummo!  How easy was that?